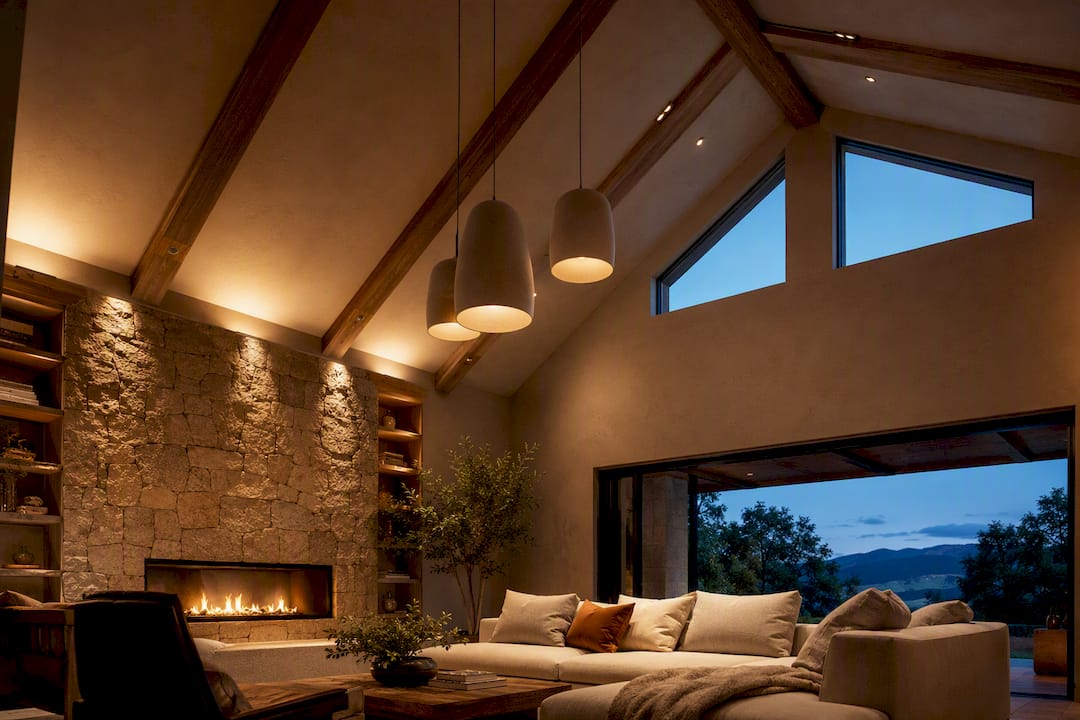
Design your open concept lighting plan by mapping furniture into activity zones, then layer ambient, task, and accent light over each one with separate controls. That single approach, tested with a hero fixture and a few quieter supporting pieces, solves most of the flat, overlit, or visually chaotic rooms homeowners end up with. Start by drawing the footprint, then build controls around it.
TL;DR:
- Installing zone-based controls with separate switches and dimmers for each activity area ensures flexibility and prevents glare or uneven lighting.
- Matching color temperatures between 2700K and 3000K across all fixtures creates a cohesive, warm ambiance and avoids disjointed visual zones.
- Using a single hero fixture over focal points like the island or seating area, while keeping other fixtures understated, emphasizes intentional design.
- Planning fixture size and hanging height according to the table or countertop length and standard ceiling height results in balanced, functional lighting.
- Testing lighting scenes from the main seating position before finalizing ensures even coverage, reduces glare, and confirms compatibility with dimmer switches.
Table of Contents
- Why Layered Lighting Matters in Open Floor Plans
- Common Open Concept Lighting Mistakes to Avoid
- How to Zone and Layer Your Open Concept Lighting Plan
- Choosing Fixtures and Placement for Every Zone
- Getting Color Temperature and Dimmer Compatibility Right
- Testing and Commissioning Your Lighting Plan Before You Commit
- A Real Room Recipe for Open Concept Lighting
- What Actually Matters More Than Matching Fixtures
- Let The Connected Dwelling Help You Build the Plan
- Sources
- FAQ
Why Layered Lighting Matters in Open Floor Plans
An open floor plan removes the walls that used to tell your eye where one room ends and another begins, so lighting has to do that job instead. Without walls, your fixtures become the boundary lines. A well-defined open floor plan depends on light to signal "this is the kitchen" versus "this is where you relax," and one flat wash of ceiling light flattens all of that into a single blurry room.
That's why layering matters so much here. Ambient light sets the base mood, task light handles cooking or reading, and accent light adds depth and warmth in the evening. Skip a layer and one zone always feels either underlit or glaringly bright compared to its neighbor.
A few things keep the whole space feeling like one cohesive room, instead of three unrelated ones:
- Matching color temperature across visible zones, so the kitchen doesn't read colder than the living area
- Repeating a finish (brushed brass, matte black) on at least two fixture types
- Keeping ceiling fixtures visually quiet where sightlines cross, so no two statement pieces compete for attention
Common Open Concept Lighting Mistakes to Avoid
Most open-plan lighting problems trace back to three habits, and all three are fixable without ripping into walls.
Single-switch overhead lighting is the biggest offender. When one switch controls every recessed can in a 600-square-foot great room, you're stuck choosing between "everything on" and "everything off." There's no way to dim the dining area while keeping the kitchen bright for cleanup. The fix is splitting that one circuit into zone-based groups, even if it means an electrician adding a few switches.
Competing statement fixtures show up when a homeowner falls in love with three different pendant styles and hangs all of them in view of each other. The result reads busy rather than curated. Choose one hero fixture, usually over the island or dining table, and keep everything else quiet and secondary.
Glare from poor placement happens more than people expect, especially with recessed cans aimed straight at a kitchen counter or a TV wall. Watch for:
- Bare bulbs visible from the main seating angle
- Reflections bouncing off glossy countertops or a dark television screen
- Pendants hung low enough to sit at eye level when standing at the island
How to Zone and Layer Your Open Concept Lighting Plan
This is the part that turns a vague idea into something an electrician can actually price and install.
- Map your furniture footprint first. Sketch where the sofa, dining table, island, and any desk or reading chair will sit. Everything else follows from this drawing.
- Label each zone by activity. A typical great room breaks into kitchen prep, dining, seating, circulation (hallways, entries), and sometimes a reading or work corner.
- Assign a primary fixture type to each zone. Recessed cans or track lighting usually cover ambient light across the whole floor plan, while pendants and under-cabinet strips handle task light at the island and sconces or lamps add accent light in the seating area.
- Group your switches and dimmers by zone, not by circuit convenience. Open-plan lighting works best when it's planned by activity, with controls placed where you'd actually reach for them.
- Test each group alone before combining scenes.
Good control placement usually lands in predictable spots:
- Main entry: master switch for ambient/overhead groups
- Sofa side table or wall near the seating area: dimmer for lamps and accent lighting
- Kitchen entrance or under the cabinets: dedicated switch for task lighting over the counter and island
Once each group works on its own, layer them together and check the room from your main seat. A kitchen that looks great from the sink but blinds you from the couch needs another pass on fixture angle or dimmer level, not more light.
Choosing Fixtures and Placement for Every Zone
Sizing and hanging height decide whether a fixture reads as intentional or accidental. For an island or dining table, a common starting rule is to size the pendant or chandelier to a proportionate part of the table or island's length, then adjust up or down based on how busy the surrounding zone already looks.
Hanging height follows a similar logic. A practical rule of thumb puts pendants 30 to 36 inches above a countertop or tabletop on a standard 8 to 9 foot ceiling, adding roughly 3 inches of height for every additional foot of ceiling above that. Island pendants generally look right spaced at recommended distances apart center to center for medium fixtures, though a single larger piece can replace a row of smaller ones.

Recessed or integrated ambient systems tend to outperform decorative ceiling fixtures whenever the room already has a hero piece competing for attention, since a quiet ceiling plane lets a single statement fixture actually read as a statement. Save the decorative budget for one or two pieces, not five.
Floor and table lamps carry more weight than most people give them credit for. They fill the lower third of a room with warmth that recessed lighting can't reach, and they're often the fastest fix for TV glare, since a lamp placed beside or behind the screen breaks up the reflection without dimming the whole room.

Getting Color Temperature and Dimmer Compatibility Right
Stick to 2700K to 3000K across every visible fixture in an open floor plan. That range reads as warm, cohesive light in the evening, and mixing a 2700K pendant with a 4000K recessed can two rooms away is one of the fastest ways to make a unified floor plan feel disjointed. If you're deciding between the two, our breakdown of 2700K versus 3000K covers how each temperature reads against different finishes.
Dimmer compatibility trips up more homeowners than fixture choice does. Older incandescent dimmers frequently cause flicker, buzzing, or a limited dim range when paired with LED bulbs, since the two technologies draw power differently. Dimmer manufacturers publish compatibility selectors specifically because the wrong pairing is common enough to need a lookup tool rather than a guess.
Plan separate circuits for your major zones from the start, and if you're adding smart control, keep a physical wall switch as a fallback rather than removing it entirely.
Pro Tip: *Before you buy a full set of dimmers, test one bulb and one dimmer together at the lowest dim setting.
Testing and Commissioning Your Lighting Plan Before You Commit
Don't judge the plan with every light blasting at full output. Commissioning works better when you test from where you actually sit, one scene at a time.
- Turn on each zone group alone first, checking for even coverage and no harsh bright patches on the ceiling.
- Combine two or three zones into a realistic evening scene (dining plus ambient, for example) and sit in your main chair to check for glare or shadowed faces.
- Photograph the room from the couch and the kitchen sink. Bright ceiling hot spots and TV reflections show up more clearly in a photo than in person.
- Confirm your dimmer's lowest setting doesn't flicker and its brightest setting isn't blinding at the counter.
- Call an electrician before finalizing any zone that needs a new circuit, or any fixture near a bathtub or shower, since the International Residential Code sets a specific 3 by 8 foot clearance zone around tubs and showers where pendant and cord-hung fixtures aren't allowed and listings matter.
A Real Room Recipe for Open Concept Lighting
Our Room Recipe 001 applies exactly this sequence in a warm modern living room: one hero pendant, recessed ambient light kept quiet, and lamps doing the evening heavy lifting.
- One statement fixture over the main seating cluster, everything else understated
- Warm 2700K lamps and sconces layered beneath the ceiling plane
- Zones tied together with one repeated brass finish
If you want the layering logic explained from the ground up, our beginner's guide to layered lighting walks through each layer in more depth.
What Actually Matters More Than Matching Fixtures
Homeowners obsess over finding a chandelier and pendants that match perfectly. I'd rather see you nail the controls first. Live with your zones and dimmer scenes for a week before locking in decorative fixtures, and loop in your electrician on circuit groups before drywall closes anything up.
Let The Connected Dwelling Help You Build the Plan
This site offers fixture picks and product comparisons that help you understand which pendant, dimmer, or bulb works together after mapping your zones. Where this article covered the layout logic, our lighting resources go further into curated product recommendations built around the exact layered approach described above.

If you're deciding between smart bulbs and smart switches for your new zone controls, our comparison of smart bulbs versus smart switches walks through which one preserves that wall-switch fallback we recommended earlier. Start by browsing the lighting category page for fixtures sized to your zones, then bring your furniture map and zone list with you when you shop; it'll save you a return trip.
Sources
- IRC 2021 E4003.11 bathroom/shower luminaire guidance — Jaspector
- LED compatibility selector guidance — Leviton
- Open Plan Lighting Zones: A layout guide — Ahomefy
FAQ
What Are Good Lighting Ideas for an Open Concept Space?
Zone the room by activity first, then layer ambient, task, and accent light over each zone with its own control. A hero pendant over the island or table, quiet recessed ambient lighting, and warm lamps or sconces at seat height cover most open concept lighting plan needs without one style dominating the room.
What Is the 30 to 36 Inch Lighting Rule?
It's the common hanging-height range for pendants over a table or island, measured from the tabletop or countertop to the bottom of the fixture. Add roughly 3 inches for every foot of ceiling height above the standard 8 to 9 feet.
What Is Replacing Open Concept Living?
Full open concept layouts haven't disappeared, but many homeowners are softening them with partial dividers like open shelving, half walls, or defined lighting zones instead of tearing every wall down. Lighting often does the work a wall used to do, separating a kitchen from a living area through contrast and control rather than framing.
What Lighting Trends Should I Avoid in a 2026 Renovation?
Avoid mismatched color temperatures across visible zones and rows of identical recessed cans with no dimming groups. Trend coverage on mood-oriented, layered lighting for 2026 points toward warmer, more intentional fixture choices rather than uniform overhead grids, which lines up with the zoning and layering approach covered throughout this guide.