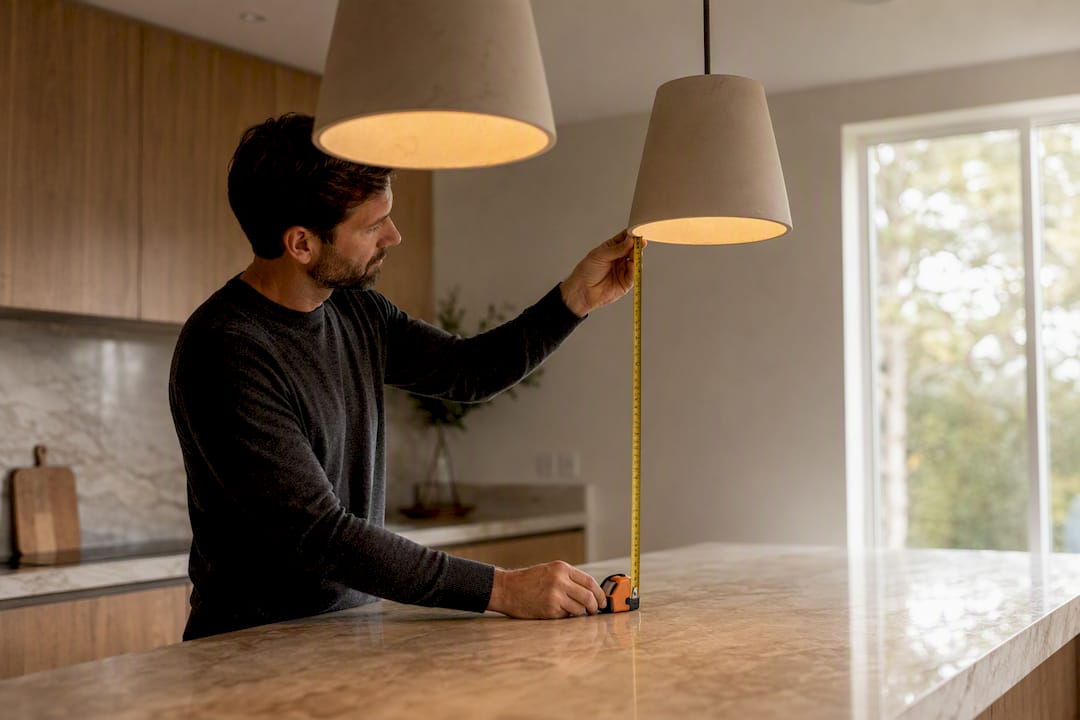
For most kitchen islands, three pendants spaced 24 to 30 inches apart, center to center, is the sweet spot, hung 30 to 36 inches above the countertop. Shorter islands under 60 inches usually only need two. Longer islands beyond a modest length often call for a linear fixture instead of a row of pendants. Fixture diameter, ceiling height, and how the island gets used all nudge those numbers, and the formulas below show you exactly how.
TL;DR:
- Islands under 60 inches typically need only two pendants spaced roughly 24 to 30 inches apart, unless a statement fixture or linear light is preferred.
- For islands longer than 10 feet, a linear fixture often provides better coverage and visual balance than multiple pendants.
- Pendant placement formulas include dividing the island length by four for two fixtures, splitting into equal segments for three or more pendants, or subtracting margin before dividing for precise end spacing.
- Ceiling height influences hanging height, with 8-foot ceilings supporting 30 to 32 inches, and taller ceilings requiring incremental adjustments.
- Fixture diameter affects spacing: small pendants need about 24 inches between centers, while larger pendants require 32 to 36 inches, and over-sized fixtures are best used sparingly or as a single statement piece.
Table of Contents
- How Many Pendants Does Your Island Actually Need?
- Spacing Formulas and Worked Examples You Can Use
- Standard Hanging Height and Ceiling Adjustments
- How Pendant Size Changes Your Spacing Math
- Measure, Mark, and Mock Up Before You Drill
- Common Layout Mistakes That Throw Off the Spacing
- A Thoughtful Approach to Pendant Design
- Safety and Code Considerations for Island Pendants
- When to Break the Spacing Rules on Purpose
- How TheconnectedDwelling Helps You Get the Layout Right
- Sources
- FAQ
How Many Pendants Does Your Island Actually Need?
The count depends on length but is not linear. Adding more small pendants beyond a certain point may look cluttered rather than intentional.
A typical guide used when sizing islands suggests fewer pendants for shorter islands and more for longer ones, with decisions influenced by fixture size and usage rather than strict increments.
A quick sanity check: budget roughly one pendant for every 24 to 30 inches of usable island length. An 84 inch island divided by 28 inches lands you at three, which lines up with the buckets above.
The real decision isn't math, though. It's whether you want two large statement pendants or three smaller ones. Two big fixtures read as sculptural and calm. Three smaller ones read as rhythmic and busy in a good way, but only if the spacing is even. On islands longer than about 10 feet, a linear fixture often solves the problem better than pendants can. Once you cross that length, individual pendants start to look like a fence instead of a light source.
Spacing Formulas and Worked Examples You Can Use
Once you know your pendant count, the math to place them is simple. All three formulas below measure from the usable countertop surface, not the total footprint, since overhangs throw off the visual balance.
1. Divide-by-four (two pendants) Divide your island's usable length by four. That number is the distance from each end to the pendant center, and it also happens to equal the space between the two pendants.
Example: A 96 inch island divided by 4 equals 24. Place one pendant 24 inches from the left end, one 24 inches from the right end. That leaves a 48 inch gap between them, comfortably inside the 24 to 36 inch range most designers recommend.
2. Divide-by-three or equal segments (three or more pendants) Split the island into equal segments based on your pendant count, then center a fixture in each segment.
Example: A 108 inch island with three pendants splits into three 36 inch segments. Each pendant sits at the midpoint of its segment, 18 inches, 54 inches, and 90 inches from the left edge, giving you 36 inch centers throughout.
3. Subtract-margin-and-divide (precise end control) Subtract 12 inches total (6 inches off each end as margin), then divide the remainder by the number of gaps between pendants.
Example: A 90 inch island minus 12 inches leaves 78 inches. With three pendants, you have two gaps, so 78 divided by 2 equals 39 inch centers, with the outer pendants sitting exactly 6 inches inside each end.

All three methods land you inside the 24 to 30 inch center-to-center range most guides recommend for standard mini pendants. Wider shades or unusually long islands can justify pushing that to 30 or even 36 inches, which the next section covers in more detail.
Standard Hanging Height and Ceiling Adjustments

The baseline is 30 to 36 inches from the countertop to the bottom of the fixture, and that range works for most standard 9 foot ceilings without any adjustment. Modern Chandelier's height guidance confirms this is the industry norm, and it's the number we point readers to first.
Ceiling height changes things, though. A room that feels cramped with pendants hung too low, or one where the fixtures float awkwardly high, usually traces back to skipping this step.
- 8 foot ceilings: hang pendants 30 to 32 inches above the counter
- 9 foot ceilings: 32 to 34 inches
- 10 foot ceilings and taller: 34 to 36 inches, adding roughly 3 inches for every extra foot beyond that
If your island doubles as a bar with counter-height stools, factor in the seated eye line. Nobody wants to look straight into a bulb while eating breakfast. The most reliable test costs nothing: have the tallest person in the household stand at the island and confirm the fixture bottom sits above their eye line and below the natural sightline into the room. That single walk-through catches more mistakes than any tape measure.
How Pendant Size Changes Your Spacing Math
Fixture diameter drives spacing as much as island length does, and it's the variable most DIY layouts get wrong first. A run of small pendants can sit closer together than a run of oversized ones, even on the exact same island.
Here's roughly how diameter maps to center-to-center spacing:
- Mini pendants (6 to 10 inches): around 24 inches center to center
- Medium pendants (10 to 14 inches): 28 to 30 inches
- Large pendants (14 to 18 inches): 32 to 36 inches
- Extra-large pendants (over 18 inches): usually better as a single fixture, or a well-spaced pair rather than a trio
The rule of thumb worth memorizing is the clear-air check: leave at least one full fixture diameter of open space between pendant bodies. A 14 inch shade needs 14 inches of daylight visible between it and its neighbor, or the fixtures visually merge into one blob from across the room.
Pro Tip: If your spacing math produces centers tighter than one shade diameter apart, don't crowd them; drop a fixture instead. Two well-spaced large pendants almost always beat three that are touching visually.
Measure, Mark, and Mock Up Before You Drill
- Measure usable countertop length. Exclude any overhang, since that portion doesn't factor into visual balance or task coverage.
- Mark the island's centerline with a pencil or tape, running the full length of the counter.
- Apply your chosen formula (divide-by-four, equal segments, or subtract-margin-and-divide) and mark each pendant's center point directly on the counter with tape.
- Mock up with temporary weights. Hang string with a small weight, or clamp a lamp, at each marked height and position. Stand back, sit at the counter, and walk through the kitchen doorway to check the sightline.
- Locate joists and junction boxes, then bring in an electrician to confirm your marked centers align with safe, code-compliant wiring points before anything gets drilled.
Pro Tip: Do the mock-up test at night with the actual bulbs you plan to use. Daylight hides glare problems that show up immediately once the sun goes down.
Common Layout Mistakes That Throw Off the Spacing
Most spacing complaints trace back to one of five fixable errors.
- Measuring edge to edge instead of center to center. Fix: always measure from the center point of one fixture to the center point of the next.
- Ignoring fixture diameter when running the numbers. Fix: re-run your count using the diameter bands above, or size down the shades.
- Hanging too low. Fix: recheck against the 30 to 36 inch rule and the tallest-person sightline test.
- Aligning pendants flush with the island ends. Fix: keep the outer fixtures 6 to 12 inches inside each end so the layout doesn't feel like it's spilling off the counter.
- Crowding fixtures that are too wide for the space. Fix: apply the one-diameter clear-air test, and drop a fixture if the shades are touching visually.
A Thoughtful Approach to Pendant Design
Every spacing decision is really a trade-off between task light and visual calm. More pendants mean more even light across the counter, but too many turns a clean island into visual clutter. Fewer, larger fixtures create a quieter room, though you sacrifice some coverage at the ends. A calm pendant layout is generally preferred unless the island is genuinely long enough to need extra coverage.
Color temperature matters just as much as placement. For kitchen pendants, staying in the 2700K to 3600K range is usually warm enough to feel inviting, neutral enough to see what's on the cutting board. The DOE's lighting efficiency guidance backs this range for task areas specifically.
- Fewer, larger pendants favor visual calm over raw coverage
- More, smaller pendants favor even light but need tighter spacing discipline
- A 2700K to 3600K range balances warmth with enough clarity for prep work; see our 2700K vs. 3000K breakdown for the full comparison
This guidance comes from a design-focused source at The Connected Dwelling.
Safety and Code Considerations for Island Pendants
Spacing decisions can't override electrical safety, and a few code basics apply no matter how the layout math works out. Pendant fixtures over islands need a dedicated junction box, and that box has to be positioned to match your planned centers, not the other way around. If your spacing formula puts a pendant where there's no box, you need an electrician to add one rather than shifting the fixture off its ideal center.
Weight matters too. Heavier pendants, especially glass or metal fixtures over a few pounds, need a box rated for the load, not just a standard fixture box. Always check the manufacturer's weight rating against what your electrical box and mounting hardware can actually support.
Ceiling height also plays into clearance codes in some jurisdictions, particularly around exposed heat sources near combustible materials like wood cabinetry or open shelving. This rarely affects standard LED pendants, since they run cool, but it's worth a quick check if you're using older-style incandescent or halogen fixtures.
Finally, any rewiring or new junction box installation should go through a licensed electrician and get inspected per your local building code. Spacing formulas get you the layout. Code compliance gets you a layout that's actually safe to live with. Never treat the two as interchangeable steps, and never finalize pendant positions before confirming the electrical work can support them.
When to Break the Spacing Rules on Purpose
The formulas above cover most islands, but not every kitchen fits a formula. Islands with an off-center sink, a seating overhang on one end, or a single oversized statement pendant sometimes look better breaking the symmetric grid entirely. Shifting pendants toward the prep zone rather than centering them over the full island length is a deliberate, defensible choice when the sink or cooktop sits off-center.
The test for any deviation is the same mock-up routine covered earlier: hang temporary weights, walk the room, and check sightlines from the main entry point. If it looks resolved rather than accidental, it's probably working. If it looks like a mistake, it probably is one.
How TheconnectedDwelling Helps You Get the Layout Right
TheconnectedDwelling exists to answer the question that comes right after the math: which fixtures actually work for your island. Rather than handing you a generic product list, we explain the reasoning behind each pick, why a certain shade diameter suits a narrow island, why a warmer color temperature fits a family kitchen better than a stark white one, so the decision makes sense before you buy anything.

If you're still weighing pendant diameter against your spacing math, our curated lighting collection is organized around exactly that kind of decision, not just brand names. And if the color temperature question is where you're stuck, the 2700K vs. 3000K guide walks through which range fits a kitchen versus a living space. Browse the collection, or reach out through the site if you want a second opinion on your specific island before you order.
Sources
- Pendant Light Height Over Kitchen Island: The Complete Guide – Modern Chandelier
- 7 Best Pendant Light Spacing Kitchen Island Rules (2026 Guide) — LightingStudio360
- Pendant Spacing Over an Island: The Simple Formula – Vatero Bath + Kitchen
- Building America Best Practices — Daylighting and Lighting Efficiency Guidance (DOE / EERE)
FAQ
What size pendants work for a 6 foot island?
A 60 inch island typically fits two pendants using the divide-by-four method, placing each one 15 inches from the ends with a 30 inch gap between them. Medium pendants in the 10 to 14 inch diameter range usually scale best at this length.
Should I use 2 or 3 pendants over my island?
It depends on length and fixture size: islands between 60 and 84 inches can go either way, but three pendants only look right if the diameters are small enough to maintain the 24 to 30 inch center-to-center spacing without crowding. If your shades are wide, two larger pendants usually read cleaner than three tight ones.
What size pendants suit an 8 foot island?
An 8 foot (96 inch) island generally calls for three pendants at roughly 28 to 32 inch centers, or two larger statement pendants using the divide-by-four formula. Past 8 feet, a linear fixture becomes a strong alternative to avoid a row effect.
How many pendant lights work over a 5 foot island?
A 5 foot island sits right at the edge between one and two pendants. Most layouts use two smaller pendants spaced around 24 to 30 inches apart, though a single larger statement fixture centered over the island also works well at this length.
How high should pendants hang above the countertop?
Standard guidance puts the fixture bottom 30 to 36 inches above the countertop surface, adjusting upward slightly for taller ceilings. Always confirm with a tallest-person sightline check before finalizing the height.