
If your Wi‑Fi drops in the bedroom, the garage, or the back patio, a mesh Wi‑Fi system for your home is usually the fix, and a simple multi-node kit will solve most dead zones within a weekend. If your home is under a few thousand square feet and speeds are fine except in one stubborn corner, try repositioning your router first. Mesh becomes the clear answer once your home is notably large or unusually laid out, spans multiple floors, or has to support a crowd of smart devices at once.
TL;DR:
- Mesh systems are most beneficial for homes over 3,000 square feet or with multiple floors, especially if interior walls and layouts weaken signal reach.
- Wired backhaul significantly improves mesh network stability and performance, making Ethernet connections worth considering for the farthest node.
- Devices supporting Wi‑Fi 6E or Wi‑Fi 7 are only advantageous if your household has compatible gadgets, fast multi-gig internet plans, or plans to upgrade soon.
- A two-node mesh kit usually suffices for homes under 3,000 square feet, while larger or complex layouts often require three nodes for reliable coverage.
- Proper placement, firmware updates, and avoiding interference sources are critical to troubleshooting and optimizing mesh Wi‑Fi performance.
Table of Contents
- Do You Actually Need Mesh Wifi for Home Coverage?
- How to Choose a Mesh Wifi System That Fits Your Home
- How Do You Set Up and Place Mesh Nodes Correctly?
- Bands, MLO, and Roaming: What the Specs Actually Mean
- What Should a Mesh Wifi Budget Actually Look Like?
- Troubleshooting: The Fixes That Actually Move the Needle
- Blending Mesh Hardware Into Your Home Without Ruining the Look
- What Security Features Should You Expect From a Mesh System?
- Does Mesh Wifi Work Well With Smart Home Devices?
- How Much Does Mesh Wifi Affect Gaming and Streaming?
- What Causes Wifi Interference and How Do You Reduce It?
- How Do You Expand or Upgrade a Mesh System Later?
- Our Take: The Simplest Path to Reliable Home Wifi
- Help to design around your new network is also important.
- Sources
Do You Actually Need Mesh Wifi for Home Coverage?
Not every slow connection is a coverage problem. Sometimes it's your internet plan, an outdated router, or a neighbor's microwave interfering on the same channel. Before you spend money on hardware, it helps to know which symptoms actually point to a coverage gap that mesh can fix.
The tells that mesh will help:
- Wi‑Fi that works fine in the living room but disappears in the bedroom, basement, or garage
- Speeds that vary wildly depending on which room you're in, even close to the router
- A home office, patio, or backyard that never gets a usable signal
- More than many connected devices fighting for bandwidth on one router
The size math that matters. In moderately sized homes, a single high-quality router placed centrally usually covers the space just fine, especially in newer construction with fewer interior walls. Between 2,500 and 3,000 square feet, you're in a gray zone: layout and building materials decide it. Brick, concrete, plaster, and metal ductwork all eat into Wi‑Fi range more than drywall does, so a 2,600 square foot brick colonial can behave like a 3,500 square foot home for signal purposes. Past 3,000 square feet, or in any home with more than one floor and a router stuck in a basement or office closet, mesh generally wins. Reviewers at Wirecutter and other outlets typically estimate that a single mesh node covers a few thousand square feet depending on your walls and layout, which is a useful gut check when deciding how many nodes to buy.
There's also a case where mesh isn't the right tool at all. If you have one specific dead zone, like a detached garage or a finished attic, and everything else in the house is solid, a wired access point might serve you better than a whole mesh system. Running a single Ethernet cable to that one spot and installing an access point often delivers more consistent performance than trying to bridge the gap wirelessly with an extra satellite node. It's less flexible, but it's usually cheaper and rock solid once it's in.
A 10 to 15 minute self-diagnosis before you buy anything:
- Stand in every room you regularly use and check signal strength and speed on your phone.
- Note which rooms drop below a usable connection, not just a slightly slower one.
- Check whether those rooms share a pattern: far from the router, behind thick walls, or on a different floor.
- Count your connected devices in your router's admin app, including smart bulbs, cameras, and thermostats.
- If you find two or more dead zones, or your device count is climbing past 20, mesh is worth the investment.
How to Choose a Mesh Wifi System That Fits Your Home
Buying mesh hardware is where a lot of homeowners overspend on specs they'll never use, or underspend and end up buying a second kit six months later. A few practical filters will save you both money and frustration.
1. Size the kit to your home, not your budget. A two-node kit fits most homes under roughly 3,000 square feet with a simple layout. Larger or oddly shaped homes, especially split-levels or homes with finished basements, usually need three nodes. Buy the kit that matches your square footage plus a little room to grow, because adding a mismatched node later can create its own compatibility headaches.
2. Don't chase 6 GHz unless you have a reason to. Wi‑Fi 6E and Wi‑Fi 7 systems add a 6 GHz band that's faster and less crowded than the older 5 GHz band, but only devices built for it can actually use it. The Wi‑Fi Alliance's Wi‑Fi Certified 7 program defines what that certification actually guarantees: wider channels, multi-link operation, and lower latency, but only when both your router and your device support it. If your phone, laptop, and TV are more than a couple of years old, most of them are probably still on Wi‑Fi 6 or earlier, and you won't feel the difference day to day. Testing from Wired backs this up: Wi‑Fi 7 mesh systems tend to justify their price mainly in very large homes, homes with multi-gig internet plans, or for early adopters who want the newest gear regardless of practical payoff.
3. Prioritize Ethernet ports over app polish. A mesh node with at least one or two Ethernet ports on each unit lets you wire a smart TV, gaming console, or desktop directly, which is more reliable than any wireless connection. It also lets you run wired backhaul between nodes, which we'll get into in the setup section. If a kit skips Ethernet ports entirely to save cost, that's a real trade-off, not a minor one.
4. Read past the marketing on app features. Parental controls, device pause schedules, and guest network toggles are genuinely useful for most households. Remote management from your phone is convenient. But watch for subscription traps: some brands lock basic security features like ad blocking or advanced parental controls behind a monthly fee. Before buying, check whether the features you actually want are free or gated behind a subscription.
5. Match your budget to a realistic cost bucket. Entry-level two-node kits typically run in the low hundreds of dollars, mid-range three-node Wi‑Fi 6 kits cost more, and Wi‑Fi 7 systems sit at the top of the market. According to CNET's testing, Wi‑Fi 7 mesh prices have dropped enough over the past year to be a realistic option for more shoppers, not just early adopters with money to burn.
Pro Tip: If two kits look similar on paper, prioritize the one with better app diagnostics over the one with a slightly higher headline speed. Wirecutter's testing found that ease of setup and clear connection quality data matter more to most households than chasing the biggest throughput number on the box.
How Do You Set Up and Place Mesh Nodes Correctly?
Most mesh Wi‑Fi complaints trace back to setup mistakes, not bad hardware. Get the sequence right and you'll avoid weeks of troubleshooting.
Before you start, gather:
- Your modem and its login credentials, if your provider requires one
- The mesh app downloaded and your account created
- A rough sketch of your home's floor plan with your problem rooms marked
- Ethernet cable if you plan to wire any nodes (strongly recommended for at least one)
The setup sequence:
- Connect your main node directly to your modem with an Ethernet cable.
- Place the main node centrally in your home, elevated on a shelf or table rather than the floor, and away from thick walls, metal appliances, and other electronics that cause interference.
- Power on and run the app's initial setup, which typically takes 10 to 15 minutes.
- Add your first satellite node roughly halfway between the main node and your farthest problem room, not inside the problem room itself.
- Add additional satellites following the same halfway logic, spacing nodes roughly 30 to 40 feet apart depending on your walls.
- Run the app's built-in signal test at each node's location before finalizing placement.
- Walk your home with your phone, checking speed and signal in every room you flagged during your self-diagnosis.
The single most common placement mistake, according to PCMag's setup guidance, is putting a satellite node directly in the dead zone you're trying to fix. That node needs a strong connection back to the main node to work at all, and a dead zone is, by definition, where signal is weakest. Move the satellite to the strongest signal point closest to the dead zone instead, even if that feels counterintuitive.
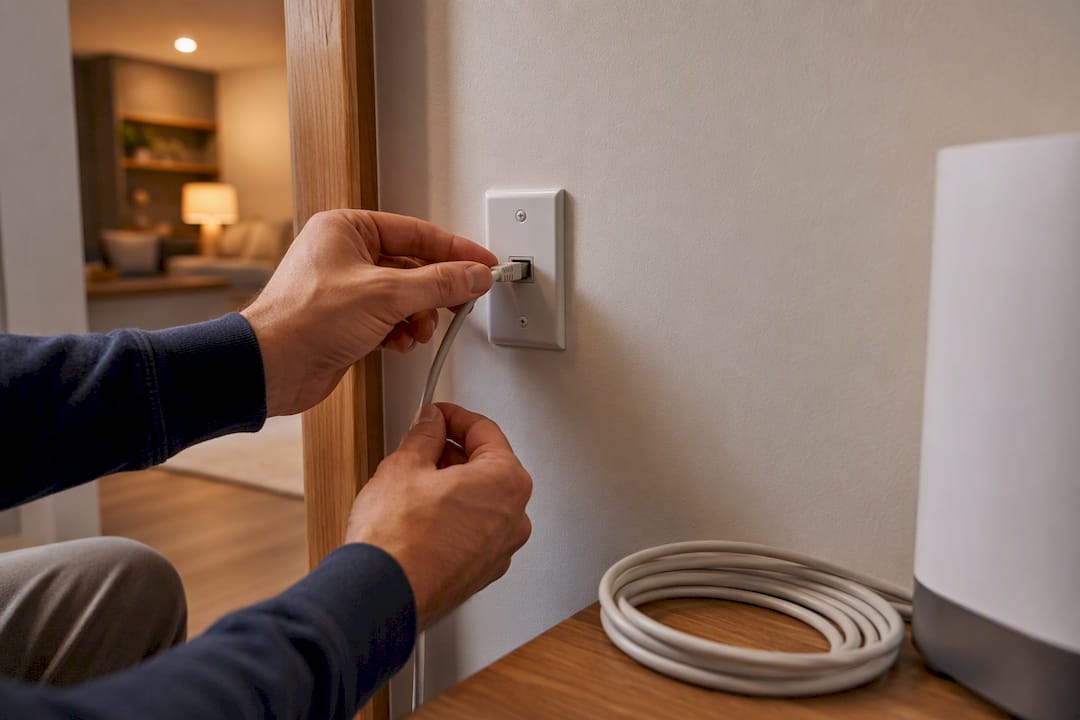
Wired versus wireless backhaul is worth understanding before you place anything. Backhaul is the connection between your nodes, and it can be wireless (using part of the Wi‑Fi signal itself) or wired (a physical Ethernet cable running between nodes). Wireless backhaul is easier to install since there's no cable to run, but it eats into your available bandwidth because the nodes are talking to each other on the same airwaves your devices use. Wired backhaul removes that penalty entirely and delivers noticeably steadier performance. One setup guide on mesh backhaul planning notes that wiring even a single satellite node can dramatically improve real-world stability, and it's one of the highest-value, lowest-cost upgrades you can make to a mesh system. If you already have Ethernet in the walls, or you're willing to run one cable through an attic or crawl space, wire at least your farthest node.
How to verify it actually worked:
- Open the app and check the connection strength indicator for each node. Anything showing weak or fair signal to its parent node needs to move.
- Run a speed test in your previous dead zones at the times of day you actually use them, not just once.
- Watch for devices that seem stuck on a distant node instead of switching to the closer one as you move through the house.
- Give it 24 to 48 hours before declaring victory. Some band steering and device handoff behavior needs a day to settle.
Bands, MLO, and Roaming: What the Specs Actually Mean
Every mesh system talks about bands and roaming in marketing copy, but the practical impact on your daily Wi‑Fi is simpler than the spec sheets make it sound.
The three bands, in plain terms:
- 2.4 GHz travels farthest and penetrates walls best, but it's slower and more crowded, since older smart home devices, baby monitors, and even microwaves use it too.
- 5 GHz is the everyday workhorse for most laptops, phones, and streaming devices: faster than 2.4 GHz, shorter range, less interference.
- 6 GHz (found in Wi‑Fi 6E and Wi‑Fi 7 systems) is fast and virtually interference-free because so few devices use it yet, but its range is shortest of the three and only newer devices can connect to it at all.
Multi-link operation, or MLO, is a Wi‑Fi 7 feature that lets a device use more than one band at the same time instead of switching between them. In practice, this mostly shows up as steadier connections during video calls or gaming sessions rather than a dramatic top-speed jump most people notice. Some higher-end mesh systems also dedicate an entire radio band exclusively to backhaul traffic between nodes, which keeps that node-to-node conversation from competing with your devices for airtime. That's a real performance advantage, not just a marketing checkbox, particularly in larger homes with three or more nodes.
Roaming and band steering explain the "sticky device" problem. Band steering is the system automatically nudging your devices toward whichever band and node gives the best connection. When it works well, you never notice it. When it doesn't, your phone stays locked onto a distant node with two bars instead of switching to the closer one with full signal, a problem often called "sticky client" behavior. Most mesh apps let you check which node each device is connected to, and if you spot a stuck device, walking closer to the intended node and toggling Wi‑Fi off and on usually forces the handoff.
Wired's testing found that Wi‑Fi 7's theoretical speed and latency gains mostly show up in homes with multi-gig internet plans and a meaningful number of Wi‑Fi 7 devices already in the house. If you're still running gigabit internet and a phone that's a few years old, a solid Wi‑Fi 6 mesh system will feel just as fast in practice, and you'll save real money.
What Should a Mesh Wifi Budget Actually Look Like?
Mesh pricing splits fairly cleanly into three tiers, and knowing what each buys you prevents both overspending and disappointment.
Entry-level Wi‑Fi 6 kits (two nodes) sit at the lowest price point and cover most homes under 3,000 square feet with straightforward layouts. You'll get solid coverage and basic app features, but fewer Ethernet ports and no 6 GHz band.
Mid-range Wi‑Fi 6 or 6E kits (typically three nodes) cost more but add better processors, more Ethernet ports per node, and sometimes a dedicated backhaul band. This tier suits larger homes, multi-floor layouts, and households with 20 or more connected devices.
Wi‑Fi 7 systems sit at the top of the price range, though CNET's coverage notes that prices in this tier have dropped enough recently to be realistic for more shoppers, not just people chasing the newest spec sheet. This tier makes the most sense for very large homes, gigabit-plus internet plans, or households already stocked with Wi‑Fi 7 devices.
On subscriptions: most homeowners don't need a paid subscription tier. Basic parental controls, guest networks, and device management should be free features on any kit worth buying. Reserve subscription spending for advanced threat protection if you specifically want it, and check what's actually included before checkout rather than assuming.
Budgeting for expansion: extra nodes for later additions typically cost about the same per unit as buying them in the original kit, so there's rarely a bulk discount lost by starting small. If you're planning wired backhaul, budget separately for a small unmanaged switch and enough Ethernet cable to reach your farthest node.
Final checklist before you check out:
- Does the kit size match your square footage, with one node of buffer room?
- Does every node have at least one Ethernet port?
- Are parental controls and guest networking free, not subscription-gated?
- Is the brand's firmware update policy current, especially if the hardware is made overseas? The FCC's covered equipment list is worth a quick check for that reason, and recent FCC policy changes affecting software updates for some foreign-made routers are worth knowing about before you buy.
- Does the return window give you enough time to test it in your actual home?
Troubleshooting: The Fixes That Actually Move the Needle
Most mesh problems have a boring fix. Work through these in order before assuming you need new hardware.
- Update firmware first. Open your app and check for pending updates on every node, not just the main one. Outdated firmware causes a surprising share of dropped connections and slow handoffs.
- Rule out old hardware interference. If your old router or modem is still plugged in and broadcasting, turn it off completely or set it to bridge mode. Two networks fighting over the same channels will hurt both.
- Nudge node placement by a few feet. Moving a satellite node higher, away from a metal filing cabinet, or out of a closet often fixes weak signal faster than any software setting.
- Toggle band steering and QoS. If one device seems perpetually stuck, check your app's band steering setting; some systems let you force a device onto the faster band manually. Quality of service settings can also prioritize video calls or gaming traffic over background downloads.
- Set up the guest network properly. Keeping visitors and smart home gadgets off your main network reduces congestion and adds a layer of separation if a smart device gets compromised.
Pro Tip: Run a speed test in your problem room before and after each change, and write the numbers down. It's the only way to know whether a tweak actually helped or you're imagining it.
If you've worked through firmware, placement, and settings and a room is still weak, that's your signal to add wired backhaul to the nearest node or bring in a professional installer, especially in homes with plaster walls or old wiring that makes DIY cable runs impractical.
Blending Mesh Hardware Into Your Home Without Ruining the Look
A mesh node doesn't have to look like a piece of lab equipment sitting on your console table. A slim shelf placed at the right height keeps a node elevated for signal purposes while tucking it above eye level, and small dedicated stands do the same job without eating counter space.
A few placement habits that protect both signal and style:
- Route power cables along baseboards or behind furniture using adhesive cable clips rather than letting them dangle across a wall.
- Skip metal bookcases or mirrored cabinets near a node. Dense metal and glass both degrade signal more than wood or fabric-covered furniture.
- Choose an open shelf over a closed cabinet for node placement. A closed cabinet muffles signal the same way a closed oven muffles sound.
- If a node has to sit in a high-traffic room, treat it like any other object on display: pick a stand or shelf that matches your existing finishes instead of leaving the factory box visible.
Even a short decorative shelf or a simple cable cover can let you place a node in plain sight without it looking like an afterthought, a principle TheconnectedDwelling has covered in more detail in its guide on building a smart home that doesn't look like a smart home.
What Security Features Should You Expect From a Mesh System?
Every current mesh kit worth buying should support WPA3, the current Wi‑Fi encryption standard that replaced the older and weaker WPA2 protocol. WPA3 makes it significantly harder for someone nearby to intercept your traffic or guess your password through brute force, and it's a baseline requirement, not a premium feature, on any modern kit.
Guest networks deserve more use than most homeowners give them. A separate guest network keeps visitors off your main Wi‑Fi entirely, which matters more than it sounds: if a guest's phone is compromised, it can't reach your main network's devices. The same logic applies to smart plugs, cameras, and other IoT gadgets, many of which have historically weak security. Putting them on a guest or IoT-specific network isolates them from your laptop and personal devices.
Parental controls in most mesh apps let you pause internet access to specific devices, set schedules by time of day, and block categories of content. These work well for younger kids but are easy for tech-savvy teenagers to work around, so treat them as a household tool rather than a foolproof lock.
Some brands also offer built-in threat detection that flags suspicious devices or blocks known malicious sites automatically. This is genuinely useful, but as covered in the buying section, check whether it's included free or locked behind a subscription before assuming it comes standard.
Does Mesh Wifi Work Well With Smart Home Devices?
Mesh systems generally handle smart home and IoT devices better than a single router, mainly because they cover more physical space evenly. A smart lock at your front door and a smart thermostat in a back hallway both need a steady connection, and a router struggling to reach either one will cause more dropped commands and delayed automations than most homeowners realize.
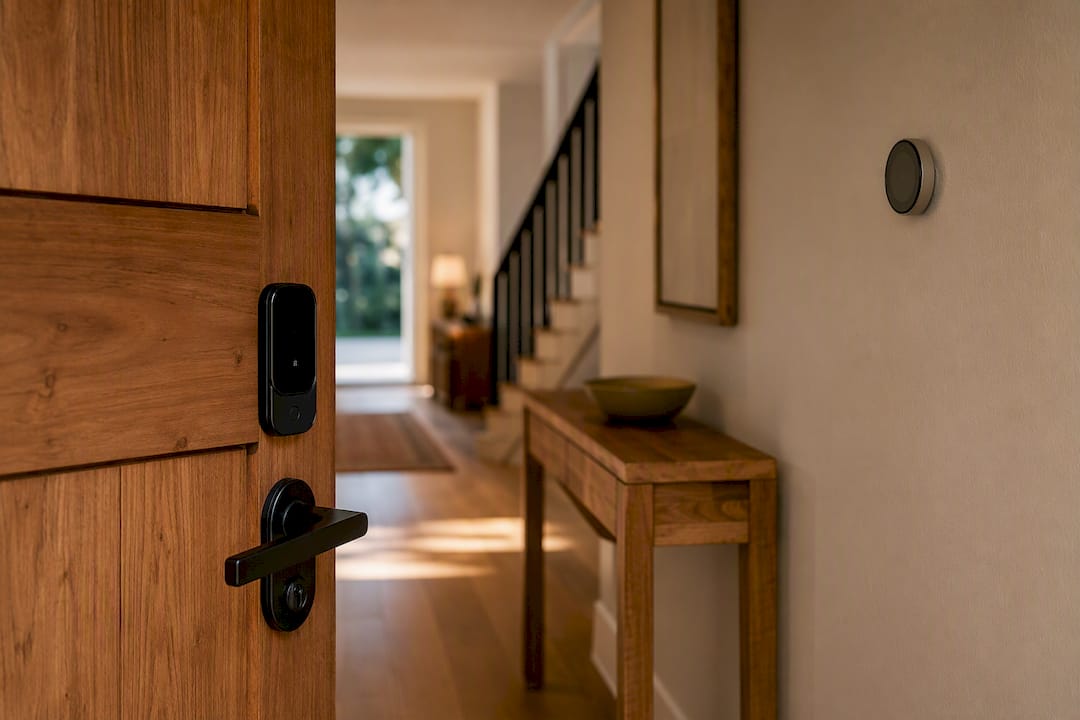
Most IoT devices, like smart bulbs, plugs, and sensors, only support the 2.4 GHz band, which is also the band with the longest range. That's actually convenient: your mesh system's 2.4 GHz coverage tends to extend further than 5 GHz or 6 GHz, so devices tucked in a garage or basement usually connect fine even where your laptop wouldn't get a strong 5 GHz signal.
The guest network principle from the security section applies here too. Segmenting smart plugs, cameras, and sensors onto a separate network keeps a compromised device from having a direct path to your computer or phone. Many mesh apps now offer a dedicated "IoT" network mode built for exactly this, distinct from the guest network meant for visitors.
One practical note: some smart home hubs and older IoT devices don't handle mesh networks smoothly during setup, because they expect to see one consistent network name rather than a system quietly handing them between nodes. If a device struggles to connect during setup, temporarily moving it closer to your main node for initial pairing usually solves it.
How Much Does Mesh Wifi Affect Gaming and Streaming?
Mesh systems generally improve gaming and streaming performance for one simple reason: eliminating dead zones removes the buffering and lag spikes that happen when a device's signal drops out entirely, which matters more to smooth performance than chasing a slightly faster theoretical top speed.
Latency, the delay between your action and the server's response, matters more to gaming than raw speed does. Wireless backhaul between mesh nodes can add a small amount of latency compared to a single router, since the nodes are relaying data over the air instead of a direct wire. This is where wired backhaul earns its keep again: a wired connection between nodes removes that relay penalty almost entirely, which is why serious gamers with a mesh system are usually advised to wire the node nearest their console or PC and, ideally, connect the device itself directly via Ethernet.
Streaming is more forgiving than gaming because a few extra milliseconds of latency doesn't matter for a video that's already buffered a few seconds ahead. What does matter for a household streaming on multiple devices at once is having enough total bandwidth and a system that handles multiple simultaneous 4K streams without one device starving another. Quality of service settings, available in most mesh apps, let you prioritize a specific device or activity during heavy household use, which is worth setting up before a big game night rather than during one.
What Causes Wifi Interference and How Do You Reduce It?
Interference falls into two categories: other wireless signals competing for the same frequencies, and physical materials blocking the signal outright. Both are fixable, and neither requires new hardware most of the time.
Common wireless interference sources include older cordless phones, baby monitors, microwaves, and neighboring Wi‑Fi networks all crowding the 2.4 GHz band, plus Bluetooth devices operating nearby. Most modern mesh systems automatically pick the clearest channel available, but in dense apartment buildings with dozens of competing networks, manually checking your app's channel selection can occasionally reveal an obviously congested choice worth switching away from.
Physical interference comes from building materials and large objects. Brick, concrete, plaster with metal lath, mirrors, and large fish tanks all weaken signal significantly more than drywall or wood. Metal ductwork and appliances like refrigerators create dead spots directly behind them. This is exactly why the halfway placement rule from the setup section matters: a node placed with a clear line of sight to both its neighbor and the room it's serving avoids most of these physical blockers entirely.
A few mitigation habits worth adopting: keep nodes off the floor and away from large metal furniture, avoid placing a node directly behind a TV or large mirror, and if a specific room stays weak despite good node placement, check what's in the wall between the node and that room before assuming the hardware is at fault.
How Do You Expand or Upgrade a Mesh System Later?
Adding a node later is usually simple, since most mesh brands let you buy an additional unit and add it through the same app you used for initial setup, no full reconfiguration required. The catch is compatibility: adding a node from a different generation or a different brand entirely sometimes works but can limit you to the lowest common feature set, so sticking within the same product line avoids headaches.
The most common reason homeowners expand their system isn't a mistake in the original setup. It's a finished basement, a home addition, or a new home office in a converted garage that simply didn't exist when the system went in. If you're planning renovations, it's worth running Ethernet to that future space during construction, even if you don't need a node there yet, since wired backhaul is far easier to add during a renovation than after the drywall goes up.
Upgrading to a newer generation entirely, say moving from Wi‑Fi 6 to Wi‑Fi 7, makes the most sense when your internet plan itself has upgraded to multi-gig speeds, or when enough of your household's devices support the newer standard to actually benefit. Buying a full Wi‑Fi 7 system to serve a household of Wi‑Fi 6 phones and laptops mostly just future-proofs you for devices you haven't bought yet, which is a reasonable choice but not an urgent one.
Our Take: The Simplest Path to Reliable Home Wifi
Most homeowners overthink this decision and then underthink the setup. The right sequence is straightforward: assess your actual dead zones honestly, buy the smallest kit that covers your square footage with a little room to grow, wire at least one node to your main unit if you can manage a single Ethernet run, and then spend twenty minutes fine-tuning placement before assuming anything is broken.
The mistake we see most often isn't buying the wrong brand. It's buying more system than the home needs, chasing a 6 GHz band or Wi‑Fi 7 label that a household full of two-year-old phones will never touch. Save that money for a kit with better Ethernet ports and a stronger app, which will matter far more day to day than a theoretical top speed you'll never approach.
Treat the first week as a testing period, not a final verdict. Move a node a few feet, check the app's signal indicators, and adjust. A system that's 90% dialed in after a weekend of small tweaks will outperform an expensive kit dropped in the wrong spot and never touched again.
Help to design around your new network is also important.
A faster network is only half the job. The other half is making sure the hardware fixing your dead zones doesn't turn your living room into a tangle of cables and plastic boxes. This overlap between technology and room aesthetics is important: balancing technical performance without sacrificing the look of the room.

Our Connected Home guides walk through design-forward placement for routers, nodes, and the rest of your smart home hardware, alongside curated product picks and installation tips that keep cables and hardware out of sight. If you're also rethinking how a room feels once the Wi‑Fi problem is solved, our guide on smart home devices that don't look like tech pairs well with this project. Start with the Connected Home page, browse the curated recommendations, and subscribe if you want future guides on blending performance and style delivered as you build out the rest of your home.
Sources
This guide draws on lab testing and standards documentation rather than marketing claims. The FCC's covered equipment list outlines sourcing restrictions worth checking before buying networking hardware, and the Wi‑Fi Alliance's Wi‑Fi Certified 7 program defines what Wi‑Fi 7 certification actually guarantees. Independent testing from Wirecutter, CNET, and Wired informed the performance and pricing guidance throughout, alongside placement advice from PCMag.
- Supply chain covered list | Federal Communications Commission
- Wi‑Fi Certified 7 | Wi‑Fi Alliance
- The Best Wi‑Fi Mesh‑Networking Systems | Wirecutter