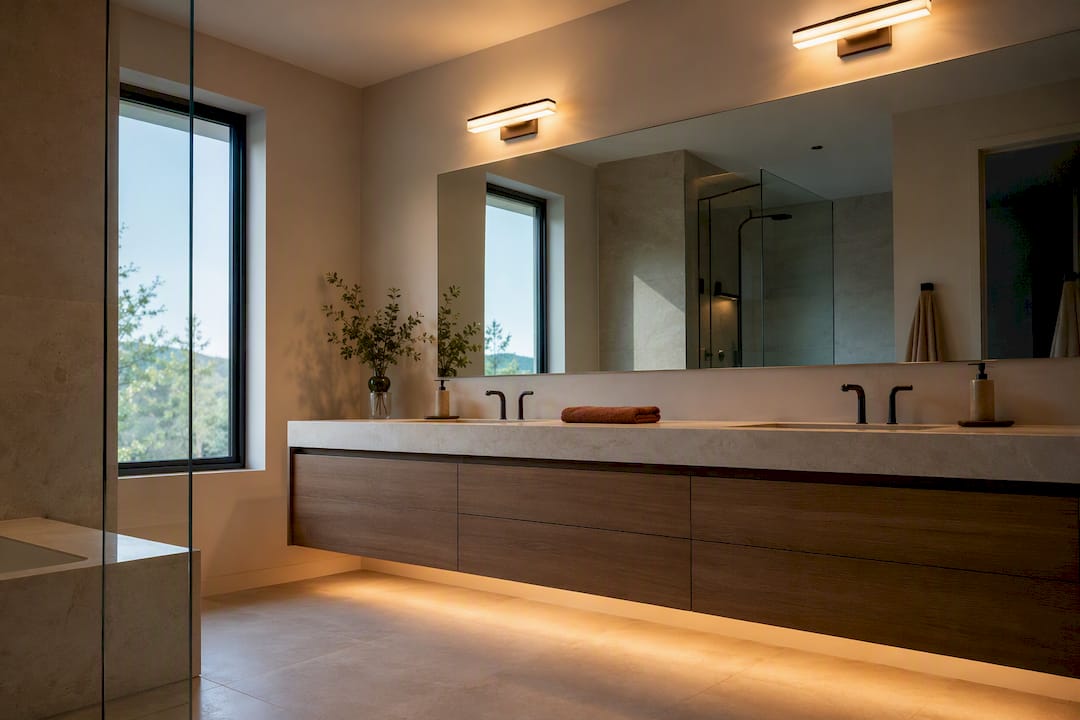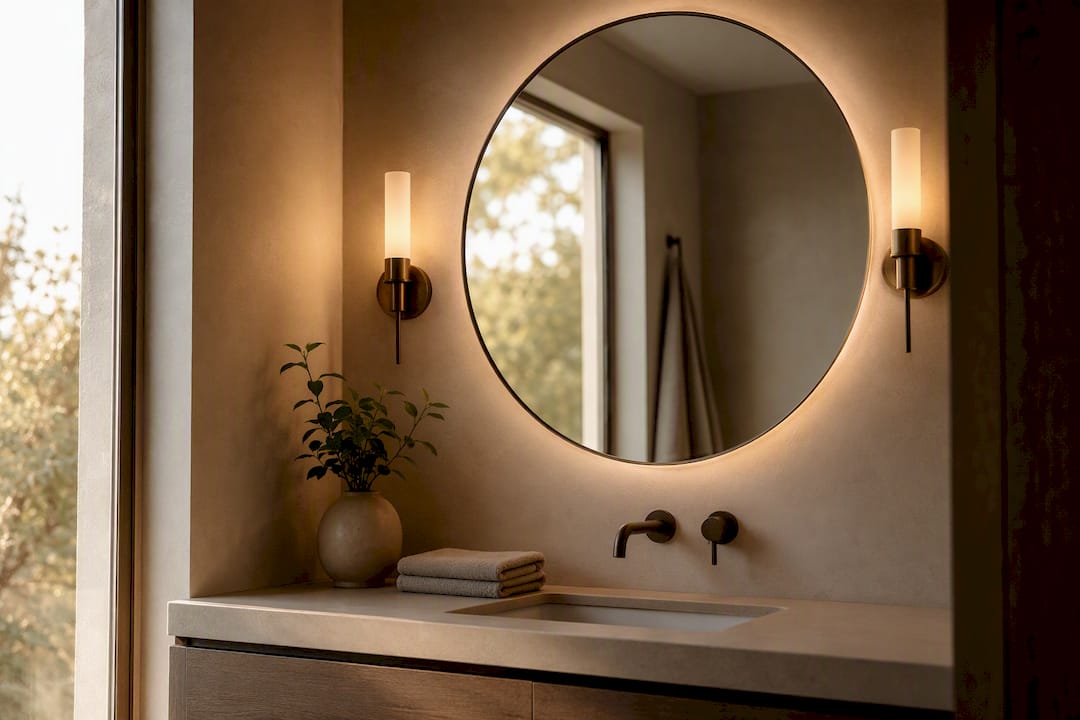
The best bathroom mirror lighting combines side sconces or a front-lit LED mirror (not just an overhead fixture) with CRI 90+ bulbs and a neutral color temperature around 3000K to 4000K. Aim for 1,200 to 4,000 total lumens depending on vanity size, and mount fixtures at eye level so light hits your face, not the mirror's frame. Everything below explains how to get there, and how to retrofit it into a bathroom that already exists.
TL;DR:
- Use side sconces placed at eye level with CRI 90+ bulbs and 3000K to 4000K Kelvin for optimal facial illumination.
- For small vanities, aim for 1,200 to 1,800 lumens total; larger setups need up to 4,000 lumens split across fixtures.
- Mount fixtures at eye level and ensure sconces flank the mirror evenly, avoiding shadows and uneven lighting.
- Choose front-lit or edge-lit LED mirrors over halo styles for better task lighting, especially in small spaces.
- Verify fixture IP ratings of at least IP44 near water sources and confirm compatibility with dimmers and controls before installation.
Table of Contents
- Which Bathroom Mirror Lighting Type Fits Your Layout?
- How Many Lumens Do You Actually Need?
- What Color Temperature and CRI Should You Choose?
- Where Should Mirror Lights Be Mounted?
- Can You Add Better Lighting to an Existing Mirror?
- Do Bathroom Fixtures Need a Special IP Rating?
- Will Dimmers and Smart Controls Work With Your Fixtures?
- How Do You Match Mirror Lighting to Your Bathroom's Style?
- What's the Fastest Way to Choose the Right Fixture?
- Author Perspective: The Connected Dwelling's Practical Design Stance
- Explore More Lighting Guidance From The Connected Dwelling
- Sources
Which Bathroom Mirror Lighting Type Fits Your Layout?
Not every fixture does the same job, and picking the wrong one is the single most common mistake we see in bathroom lighting plans. Here's how the main options actually perform.
Side-mounted sconces are the gold standard for a reason. Placed at eye level on either side of the mirror, they light your face from two angles at once, which cancels out the shadows an overhead light throws under your chin and eyes. This is why makeup artists and lighting guides consistently point to vertical sconces as the most reliable setup for close grooming work.
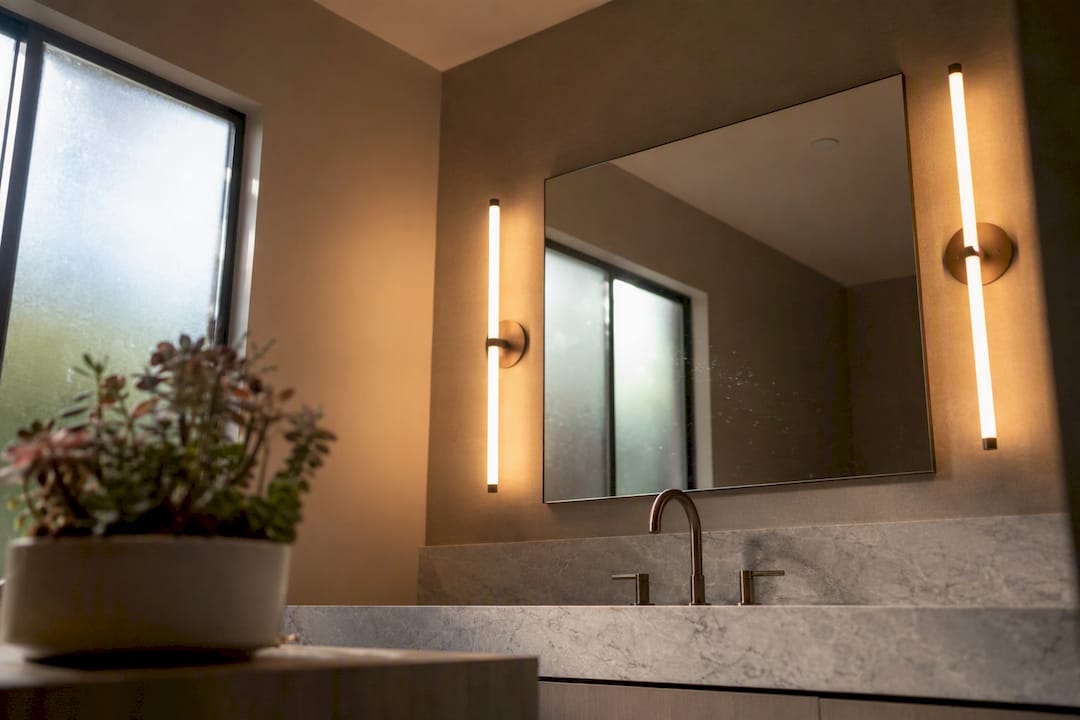
Vanity bars mounted above the mirror can work well too, but only if they're wide enough. A short bar centered above a wide mirror throws light straight down and creates the same shadow problem as a single overhead can. Look for a bar that spans most of the mirror's width.
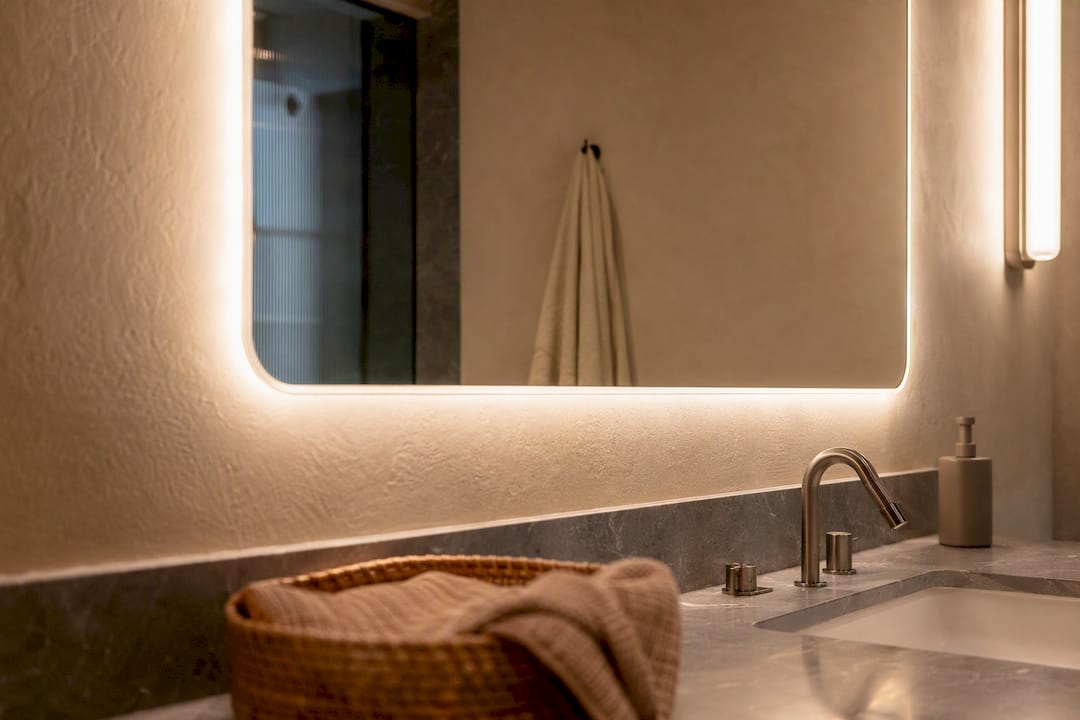
LED mirrors split into two camps, and the difference matters more than most buyers realize. Backlit (halo) mirrors glow around the edge and look striking, but that light bounces outward into the room rather than onto your face, so it tends to underperform for actual task lighting. Front-lit or edge-lit LED mirrors, which push light forward from strips embedded near the glass, do a much better job illuminating your features directly.
Your options, ranked by task performance:
- Side sconces at eye level: best face illumination, minimal shadow
- Front-lit or edge-lit LED mirror: strong standalone option, especially in small spaces
- Wide vanity bar (spanning most of the mirror): solid backup when sconces aren't possible
- Backlit halo mirror alone: attractive ambiance, weak for grooming tasks
If you want both atmosphere and accuracy, pairing a front-lit mirror with slim side sconces can provide layered light without over-illumination in a small room.
How Many Lumens Do You Actually Need?
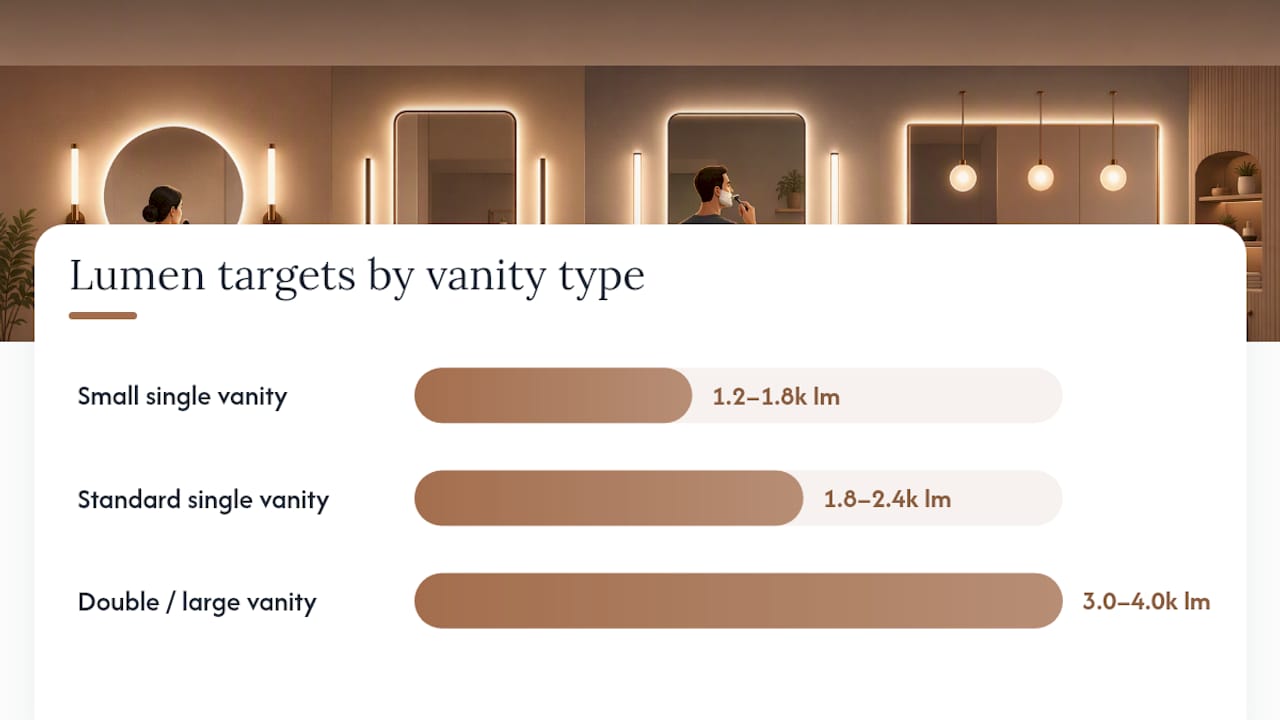
Total output matters more than any single bulb's rating, and most bathrooms are underlit rather than over-lit. A small single vanity typically needs somewhere in the range of 1,200 to 1,800 total lumens to render fine detail accurately. A double vanity or a larger mirror often calls for 3,000 to 4,000 lumens split across multiple fixtures.
That last point, splitting the light, is the part people skip. One very bright bulb centered above the mirror still creates a single shadow-casting source. Two moderate fixtures positioned on either side of your face distribute light evenly, which matters more for grooming accuracy than raw brightness ever will.
Quick lumen guide by vanity type:
- Small single vanity (powder room, guest bath): 1,200 to 1,800 lumens total
- Standard single vanity: roughly 1,800 to 2,400 lumens total
- Double vanity or large mirror: 3,000 to 4,000 lumens total, split across at least two fixtures
Lumen target: Most professional-grade grooming setups land between 1,200 and 4,000 total lumens depending on vanity size, with the higher end reserved for wide double vanities lit by multiple fixtures rather than one oversized bulb.
If you do detail makeup work professionally or you're pairing your vanity with a video-call setup, lean toward the top of these ranges. More light gives you more room to dim down later; too little light can't be fixed after installation without adding fixtures.
What Color Temperature and CRI Should You Choose?
Kelvin tells you how warm or cool a light looks, and CRI tells you how accurately it renders color. Both matter enormously for a mirror you use to apply makeup, check your skin, or shave close to the jawline.
For daily grooming, neutral white light in the 3000K to 4000K range mimics daylight closely enough to prevent the color shifts you'd notice later in a different setting. Go warmer than that (2700K) and everything takes on an amber cast that hides redness and undertone shifts. Go cooler than 4500K to 5000K and skin can look flat or bluish, which isn't much better for judging how your makeup will actually look outdoors.
CRI is the number people skip when shopping, and it shouldn't be. A CRI of 90 or higher renders skin tones and color accurately; anything lower can distort undertones enough that you walk out the door misjudging your own foundation match. Check the packaging or product listing directly. If a bulb or fixture doesn't state its CRI, assume it's mediocre.
What to look for when shopping:
- Kelvin printed on the box or listing, ideally in the 3000K to 4000K range
- CRI rating of 90 or above, stated explicitly (not just "high CRI")
- Adjustable CCT if multiple people share the bathroom with different preferences
Pro Tip: If your household includes a night owl and an early riser, look for fixtures with adjustable color temperature presets. A quick tap between a cooler daytime setting and a warmer evening one avoids the harsh, clinical glare that a single fixed 5000K bulb brings at 11 p.m.
Where Should Mirror Lights Be Mounted?
Placement fixes more lighting problems than any bulb upgrade can. Get the geometry right and even modest fixtures perform well; get it wrong and premium fixtures still throw shadows.
- Mount side sconces at eye level, roughly 60 to 65 inches from the floor. This centers the light source near your face rather than above or below it, which is what eliminates the classic under-eye and chin shadows.
- Space sconces to flank the mirror, not crowd it. Aim for enough distance between the two fixtures to cover the mirror's width evenly, generally with each sconce sitting just outside the mirror's edge.
- Size a vanity bar to at least 75% of the mirror's width. A bar significantly narrower than the mirror concentrates light in the center and leaves the edges dim, which shows up the moment you lean left or right to check your profile.
- Reserve overhead-only lighting for secondary use. If a ceiling fixture is your only option, pair it with a front-lit mirror or add sconces later. Overhead alone almost always casts shadows under brow bones and chins.
- Run a quick eye-level check after installing. Stand at the mirror and confirm the brightest, most even light falls directly on your face at eye level, not on the wall above or the counter below. If it doesn't, the fixture is mounted too high, too low, or too far apart.
Can You Add Better Lighting to an Existing Mirror?
Yes, and you don't need to gut the bathroom to do it. The right retrofit depends on what's already behind your wall and how much you're willing to open up.
Swap the mirror entirely. Replacing a plain mirror with a front-lit or edge-lit LED mirror is often the cleanest upgrade, especially if your bathroom already has a dedicated switch nearby. Many integrated mirrors now include anti-fog features and touch dimming built in, which solves two problems in one fixture.
Add a surface-mount vanity bar. If your existing wiring already feeds a fixture above the mirror, swapping that fixture for a wider bar is usually a same-day project.
Use plug-in sconces. For renters or anyone avoiding electrical work, battery-powered or plug-in LED sconces mounted with adhesive strips give you side lighting without opening a wall.
Add junction wiring for hardwired sconces. This is the most permanent and best-performing option, but it requires an electrician:
- New wiring or a new switch leg for side sconces where none currently exist
- Confirmation that the circuit meets local code for bathroom zones
- A check on the wall substrate, since tile and plaster mount very differently than drywall
If your project involves running new circuits or working near water sources, hire a licensed electrician. Simple fixture swaps on existing wiring are reasonably DIY-friendly for most homeowners.
Do Bathroom Fixtures Need a Special IP Rating?
Yes, and this is where a lot of attractive fixtures quietly fail. Bathrooms are humid, splash-prone environments, and a light fixture without the right ingress protection can corrode, fog internally, or become a genuine safety hazard over time.
For fixtures mounted near a sink or basin, look for IP44 or better, which protects against splashing water and small particles. Fixtures placed farther from direct water exposure can sometimes use a lower rating, but checking the manufacturer's guidance for your exact placement is worth the two minutes it takes.
Two features worth prioritizing beyond the rating itself:
- A demister pad, which is a thin heating element behind the mirror that keeps steam from fogging the glass, a small addition that makes a mirror genuinely useful right after a shower.
- Corrosion-resistant finishes, such as powder-coated metal or sealed brass, which hold up far better than raw or plated metals in a humid room over several years.
Will Dimmers and Smart Controls Work With Your Fixtures?
This is the step people skip, and it's the one that causes the most post-installation frustration. LED fixtures and dimmers don't automatically play well together. Mismatched dimmers and LED drivers are one of the most common causes of flicker, and that mismatch can also shorten the bulb's lifespan over time.
Before buying a dimmer, confirm it's rated for LED loads specifically, sometimes labeled LED-compatible or ELV-rated, and check that it matches your fixture's driver type. A standard incandescent dimmer will almost always cause flicker with modern LED fixtures.
Before you commit to a fixture, check for:
- Explicit LED-dimmer compatibility listed by the manufacturer
- A driver type that matches your existing or planned dimmer switch
- CCT or brightness presets if you want quick switching between grooming light and evening ambiance
Pro Tip: If you're renovating and haven't chosen a dimmer yet, test the fixture on a compatible dimmer before final installation. A five-minute test avoids tearing into a wall twice.
For added convenience, smart switches or smart bulbs let you save specific brightness and Kelvin combinations as presets, useful if your household toggles between quick grooming sessions and a relaxed evening routine. A smart bulb versus smart switch comparison can help you decide which approach fits your setup.
How Do You Match Mirror Lighting to Your Bathroom's Style?
Function and looks aren't in conflict here, but the wrong scale can undercut both. A fixture that performs well and looks out of place will get replaced eventually, so it's worth getting the aesthetics right the first time.
Modern bathrooms tend to favor slim, unobtrusive sconces or a front-lit mirror with a thin frame, letting the light do the work without adding visual clutter. Transitional spaces often look best with brushed metal sconces that have some presence but stay simple, brass or matte black both read well here. Traditional bathrooms can carry more ornate fixtures, think fluted glass shades or antique brass sconces, as long as the bulbs inside still meet your CRI and Kelvin targets.
Scale matters as much as style:
- Keep sconce pairs proportional to a small vanity; oversized fixtures overwhelm a compact mirror
- Match total fixture width to roughly 70% to 100% of the mirror's width for balance
- Layer in a soft ambient fixture, like a ceiling light on a dimmer, so the room doesn't feel clinical when you're not actively grooming
Our beginner's guide to layered lighting covers how to blend task and ambient layers in more depth if you want to take this further.
What's the Fastest Way to Choose the Right Fixture?
Cut through the options with this order of priorities, since not every factor matters equally.
- Set your lumen target first, based on vanity size (see the ranges above).
- Confirm Kelvin (3000K to 4000K) and CRI (90+) on the product listing before anything else about style.
- Check the IP rating if the fixture sits near a basin or shower spray zone.
- Verify dimmer and driver compatibility if you already have (or plan to install) a dimmer switch.
- Consider mounting constraints, including wall substrate and existing wiring, before falling in love with a specific fixture.
- Pick a finish and scale that fits your mirror and bathroom style last, once the technical boxes are checked.
| Scenario | Recommended approach |
|---|---|
| Small powder room | Front-lit LED mirror alone, 1,200 to 1,800 lumens, CRI 90+ |
| Shared master vanity | Side sconces plus wide vanity bar or front-lit mirror, 3,000 to 4,000 lumens split across fixtures |
| Rental with limited wiring | Plug-in or battery LED sconces, CRI 90+ bulbs, no electrical work required |
When comparing listings or talking to an installer, ask directly: what's the CRI, what Kelvin range does it offer, is it rated for LED dimmers, and what IP rating applies to this mounting location? Vague answers to any of those are a reason to keep looking.
Author Perspective: The Connected Dwelling's Practical Design Stance
We think good bathroom lighting should disappear into the room, doing its job without announcing itself. That means chasing warm, quiet fixtures that happen to hit 90+ CRI, not clinical-looking hardware bolted on for spec sheet bragging rights. Start by measuring your mirror, compare lumen and Kelvin specs side by side, and don't settle for anything under CRI 90. The right setup should feel invisible until you notice how much easier your morning routine has become.
— August
Explore More Lighting Guidance From The Connected Dwelling
Once you've nailed down lumens, Kelvin, and CRI for your mirror, the same principles carry into the rest of your home, and that's where our lighting hub comes in. It covers everything from choosing between 2700K and 3000K for different rooms to building out a full layered lighting plan room by room.

If you're standing in your bathroom right now trying to decide between a front-lit mirror and a pair of sconces, our recommended products page has curated picks that already meet the CRI and Kelvin targets covered here, so you're not cross-checking spec sheets alone. Browse the current lighting picks and start narrowing down what fits your vanity's width and your bathroom's style.
Sources
- How bright should a bathroom vanity light be for applying makeup? — Edward Martin (blog)
- The Best Makeup Lighting for Precise Application — Byrdie